During last summer’s CSAs and farm visits, I ended up with some rhubarb.  I knew I didn’t want to make cobbler or pie.  So, I decided to freeze it and save it for sauce at a later date.

I washed the rhubarb and cut it into 2 inches chunks.  I froze it in 3 quart bags.

Monday, I decided was the day to make sauce.  I had purchased some ham loaf from Fresh Fork CSA a few weeks back and I thought that honey rhubarb sauce would be good with ham loaf balls.

  • 7:30AM get out crock pot, add 3 q.t bags of rhubarb, 2 qt. homemade tomato sauce, turn crock pot on low
  • 7:50AM add one cup of chopped onion from the freezer
  • 8AM leave for JCC
  • 12:30PM stir
  • 1PM stir
  • 1:15PM add one cup honey from The Gyette Family.  It’s local, but definitely not my favorite kind.  Stirred in 1 cup of cider vinegar
  • 3PM used the immersion blender to make the sauce smooth
  • 3:05PM added spices 4 t garlic, 2 t mustard powder, 2 t Worcestershire sauce, 2 t salt, 2 t smoked paprika
  • 3:10PM left lid off and cooked on high
  • 4PM stirred in 2 T molasses
  • 4:40PM added 2 cans of tomato paste
  • 5PM added 1 t ancho chili pepper
  • 6:15PM Stephen comes home from work and says it’s good
  • 8:45PM I went to bed and left it on warm
  • 7:40AM Tuesday morning, I added 1 t liquid smoke and 1 t mustard
  • 8AM covered and turned up to low and left for the JCC again
  • 12:00PM tasted it – yum.  turned off crock pot and ladled into jars
  • 1PM cooled, topped jars and put in fridge

The entire ingredient list:

  • 3 qt. chopped rhubarb
  • 2 qt. home made tomato sauce (it was kind of thin)
  • 1 cup chopped onion
  • 1 cup honey
  • 1 cup cider vinegar
  • 4 t garlic
  • 3 t mustard powder
  • 2 t Worcestershire sauce
  • 2 t salt
  • 2 t smoked paprika
  • 2 T molasses
  • 2 cans of tomato paste
  • 1 t ancho chili pepper
  • 1 t liquid smoke

If I were to make the sauce again, I’d add everything except the liquid smoke at the beginning and I’d only use 1/2 cup of vinegar to start.

The recipe made about 2 1/2 quarts.  It can not be canned per se since I just made this recipe up on the fly and have no idea what the pH values would be.  I’ll probably share some with a friend, freeze some, and use some with the ham loaf.


On Wednesday, I met up with my friend Kelly to try our hand at making pierogies.  Dough, filling, technique and patience are needed to make them.

Kelly made two potato based fillings for us to try.  One was potato and caramelized onion and the other was potato and cream cheese.  We quickly learned that 10 pounds of potatoes made into filling is way too much for your average night of pierogi making.

We tried 3 different dough recipes.  The first 2 I made early in the day and let rest in the fridge.

Dough #1

  • @ 2 cups local spelt flour
  • 1/2 teaspoon fine kosher salt
  • 1 local egg, lightly beaten
  • 1/2 cup sour cream
  • 1/4 cup local butter, chopped into pieces and softened

Mix flour and salt.  Add beaten egg.  Add sour cream and butter.  Work dough until it’s not sticky.  I basically kneaded it on a floured surface.  I added more flour as needed.  It took about 5 minutes.  I wrapped the dough in plastic wrap and refrigerated it for a few hours.  This recipe is supposed to make about a dozen.  I think we got a few more than that out of the recipe.

Dough #2

  • @ 3 1/2 cups local spelt flour
  • 2 local eggs
  • 5 tablespoons local plain yogurt
  • @ 1/2 cup water

Combine until dough forms, adding more water if necessary.  Knead on floured surface to stretch the dough.  Refrigerate for at least 20 minutes.

Dough #3 was Martha Stewart’s recipe.  We made this one after working with the first two doughs.  We substituted spelt flour and used vanilla yogurt instead of sour cream.  We put it in the fridge for 20 minutes before using.  In hind sight, we should have made this dough and then worked with the other doughs while it rested.

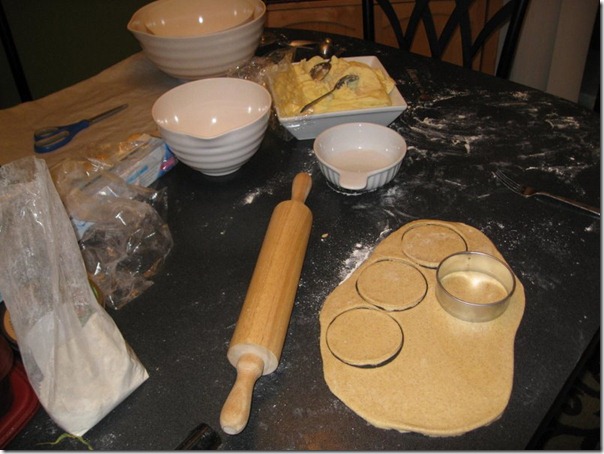
We tried using a pasta maker to roll the dough.  We decided that it was going to take way too long.  So, we got out a rolling pin.  We rolled the dough and used a 3 1/2 inch biscuit cutter to make the circles.  We were going to try an empanada press, but decided that it looked too big.

IMG_8602

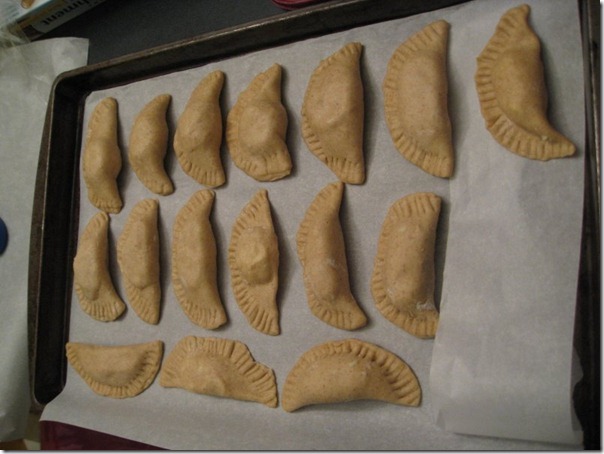
We took turns rolling, cutting, filling, and crimping shut with a fork (with a bit of water on the seal).

IMG_8599

It was hard to roll the dough to a consistent thickness.  They don’t take near as much filling as you would think.  Some looked better than others when they were done.

IMG_8601

We lined them up on parchment paper and started them freezing.

Pierogies are typically boiled until they float and then finished off in a pan with butter and onions.  Many serve them with sour cream.

We had pierogies for dinner tonight.  I tried a cream cheese / potato stuffed one made from dough #1.  It was delicious.  For our actual dinner, everyone had onion / potato stuffed dough #2.  I definitely did not care for this dough.  It seems too thick and tough.  Stephen said that the dish was good, but it wasn’t the type of dough that he would expect in a pierogie.  Nick thought the dough was great.   Sally ate 3 of them, so she liked them too.  I think both fillings could use a little more flavor.  Next time, I think some added herbs are in order.  I still haven’t tried the 3rd dough yet, but plan to try it over the weekend.  I still have a couple of other recipes for dough to try out over the next few weeks as well.

Ideally, I’ll find a recipe that is spelt or wheat based and uses yogurt or milk instead of sour cream.  I’ll also need to work on my technique for consistency.  I think the possibilities are endless and this could become a nice item to make out of real ingredients and have ready in the freezer for busy nights.


Hi, everyone. I’m back for another guest post. Today Nick and I had a fun morning skiing. We finally got enough snow for some cross-country skiing. Conditions were not perfect, but Lake Metroparks’ Chapin Forest Reservation was hopping as skiers released their pent-up urges to strap boards to their feet and have some fun. This was Nick’s second time, and he had a ball. He still shuffles in the skis. I haven’t persuaded him to glide yet. I did hear, though, all about how Curious George’s friend Bill said that skis were the most fun way to travel in deep snow. :-) I didn’t get any pictures, though several people told me how cute Nick looked on his skis.

One great thing about Chapin Forest, by the way, is that they rent kids’ skis for $3 for the first hour, prorated for rentals less than an hour! Nick lasted about 35 minutes today, so I paid all of $2. I am grateful to the Lake Metroparks for making it so affordable. There are no other costs, by the way — the ski trails are free.

Being out in the cold weather also makes this a great time to think about heart-warming foods. This one is a doozy — a fabulous recipe that I’m definitely going to make again. As Lyn may have mentioned, I’m making an effort to give her a break in the kitchen by cooking a meal once a week or so. It’s a little intimidating, but I’m forging ahead. I think I was a reasonably competent bachelor cook, but my bachelor days are long past and my skills are a bit rusty.

Anyway, enough of that. A few weeks ago, our Fresh Fork CSA brought us andouille sausage. Lyn wasn’t sure what it was, but I’ve had this spicy pork sausage from Cajun country before and enjoyed it. If you don’t have andouille handy, chorizo makes a pretty good substitute. Andouille is fatty and flavorful. It is usually used as a way to add flavor rather than as a prime ingredient. We also had several sweet potatoes and a fistful of shallots, all stored from earlier weeks’ CSA shares.

With a goal of using up what we had on hand, I found Five And Spice’s recipe for sweet potatoes and andouille online. It’s kind of like a roasted hash. It would make a good side dish, though we used it as a light entree.

If there’s one cooking technique I’ve learned from Lyn, it’s to use recipes for inspiration, not as laws. Here is my version of the dish:

  • 5 medium-to-large sweet potatoes
  • a handful of shallots
  • 1/2-3/4  pounds andouille sausage  (I used 1.3 pounds, but see below…)
  • some fresh baby spinach
  • 2-3 tablespoons olive oil
  • paprika, smoked or regular (optional, see below…)

Instructions:

  1. Peel the sweet potatoes. Remove all yucky parts. If they are late-season organic sweet potatoes, as ours were, you will definitely have some yucky parts to cut out. Cut the sweet potatoes into cubes about 1/4″ on a side.
  2. Peel and chop the shallots.
  3. Clean the spinach.
  4. Preheat oven to 425  °F.
  5. Put the andouille in a frying pan and sear it on all sides until a probe thermometer in the middle reads a safe temperature. I cooked ours to 160 °F. It coasted to above 165 °F after I took it off the heat, which was my target temperature for killing any little nasties that might be in it.
  6. Toss together the sweet potatoes and shallots with the olive oil. I forgot the paprika, but this is where you would include it if you have a better memory than me. Put them in a roasting dish. (I used a 9×13 oven-safe glass pan.)
  7. Roast the potatoes until they are starting to get tender, about 20-25 minutes. While the potatoes roast, let the andouille cool enough to handle, then break it up into 1/4″ pieces.
  8. Stir the andouille into the roasted potatoes. Roast until the potatoes are deliciously tender, about 5 more minutes.
  9. Remove from oven. Toss with the spinach, which will wilt.
  10. Serve hot.

The flavor of the andouille melts all over everything and makes a wonderful savory-sweet mix with just a touch of zing. The small pieces of sausage and potatoes let the full flavor emerge in every bite.

I have a few things I would do differently next time. First of all, I used the full 1.3 pounds of andouille that we had. If you are used to lots of meat in your dishes, you would probably love it, but we, chez Lyn Style, have been gradually growing accustomed to vegetable-centric meals. I will use less andouille next time, such as the 1/2 to 3/4 pound I suggested above. Second, I might try leaving out the olive oil. Between the oil and the sausage, it was a bit too oily for my taste.

[I wouldn’t use less andouille. I would double the sweet potatoes instead. – Lyn]

Don’t worry about it being too hot because of the sausage’s Cajun roots. Nick and Sally couldn’t get enough of the sausage. I doubt they would have liked it straight up, but the veggies tempered its heat nicely.

Enjoy the snow, and try some sweet potatoes and andouille. Until next time, this is husband Stephen, signing out.


Hi, everyone! This is Stephen, Lyn’s husband. I’m doing a guest post today.

Parsley… what to do with it? Several times a summer, our CSAs present us with big bunches of parsley. It is far more than one might want for garnish or flavoring. We could dry it, but dried parsley doesn’t keep its flavor as well as other herbs do. As a lover of world foods, though, one thing comes to my mind when I see a big bunch of parsley: Tabouli!

Tabouli is a middle eastern salad of parsley, mint leaves, and bulgur. The versions I made in our kitchen this summer were always from items at hand, so mine may not be particularly authentic. In any event, it is a light and refreshing dish, perfect for a summer evening meal.

Here is how I make Tabouli. It is a forgiving dish. I recommend measurement-free cooking for it.

1 large bunch of parsley. Flat parsley is best. A mix of flat and curly will work. Curly alone makes an odd texture and inferior flavor.

1 handful of fresh peppermint leaves. I usually aim for anything from 2-to-1 to 4-to-1 of parsley to mint, by volume. It depends on how much parsley we have and how much mint there is to harvest in our garden. I tried spearmint and can’t recommend it. Garden mint would probably be good.

2-3 small tomatoes or 1-2 larger ones, chopped. It is possible to put in too much tomato. A green-to-red ratio like Christmas holly is about right.

1/2 to 2 cups of a grain, cooked. Traditionally, this should be bulgur wheat. I’ve used couscous (not a success), quinoa (pretty tasty), and wheat berries (good flavor, but a bit chewy).

1 clove garlic, finely minced, and/or some onion, chopped

olive oil — extra virgin is nice, but any variety will work.

Combine the parsley and mint leaves, then chop them up finely. I like the texture best with pieces about 1/16″ in size. A food processor is the best way to do this. I’ve tried doing it by hand and don’t have the patience to get the pieces small enough.

Add the tomatoes and grain, as well as the onions or garlic.

Drizzle with olive oil and toss. Add olive oil if needed in order to get the leaves lightly coated, but not drenched.

Refrigerate until serving, and enjoy.

Lyn, Nick and Sally do not care for tabouli, which means I get to keep it to myself. It keeps fairly well for a few days  in the fridge, so I can enjoy a batch in a few days of packed lunches.

It’s easy to make this a local-foods dish. Olive oil isn’t produced locally, but all of the other ingredients are available from growers near us. In fact, the herbs and tomatoes may be in your garden already!

As you can see, you need not fear a big bunch of parsley in your CSA box. Instead, whip up a batch of tabouli and enjoy a delicious summer treat.


I made this recipe today and served them with potato salad and chicken bratwursts.  It was a super easy and surprising light dish.  Since we’ll be getting lots of squash this summer, I think this dish will get made often.  I also plan to experiment with different  seasonings as we go.

Recipe: Summer Squash Fritters

Summary: As usual, all measurements are approximate.

Ingredients

  • 1 medium or 2 small summer squash (like zucchini)
  • 1/2 t salt
  • 1/4 t black pepper
  • 1/4 t Penzeys Ozark seasoning
  • 1 large egg
  • 1 green onion, chopped
  • 1/2 cup whole wheat flour
  • approximately 1/4 cup olive oil for frying

Instructions

  1. Peel and great squash.
  2. Sprinkle with salt and let sit for 5 minutes.
  3. Drain and/or squeeze out as much juice as possible.
  4. In a mixing bowl, lightly beat egg.
  5. Add squash, pepper, seasoning, green onion, and flour.
  6. Mix well.
  7. Heat 2 T of oil in a nonstick skillet on medium heat.
  8. Drop 2 T of batter at a time into skillet until the skillet is full (approx. 6 fritters).
  9. Gently flatten with a spatula.
  10. Cook 3-5 min on each side until golden in color.
  11. Drain on plate lined with paper towel.
  12. Continue until batter is used, adding more oil as necessary.

Quick notes

Ozark seasoning contains salt, pepper, garlic, thyme, sage, paprika, mustard, ancho, celery, cayenne, dill weed, dill seed, caraway, allspice, ginger, cardamom, bay leaf, mace, cassia, savory, cloves. Feel free to season to your taste. Serve with yogurt, sour cream, honey mustard or other sauces.

Preparation time: 15 minute(s)

Cooking time: 15 minute(s)

Number of servings (yield): 3


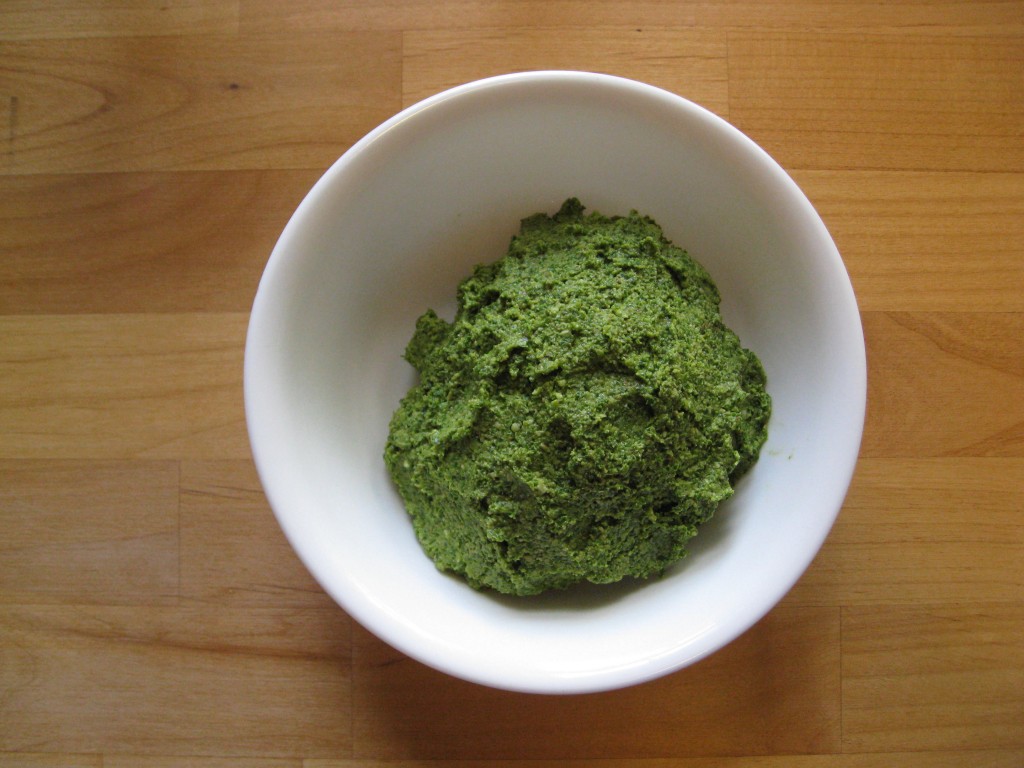
In one of my CSAs this week, we received kale.  I polled a few people and decided to make pesto.

[print_this]

Recipe: Kale Pesto

Summary: As usual, the measurements are approximate. Feel free to adjust to your taste.

Ingredients

  • 1 bunch kale, chopped with stems removed (I used Red Russian Kale)
  • 3 garlic scapes, chopped
  • 3 green onions, chopped
  • 2T olive oil
  • 1/2 cup chopped pecans
  • 1/2 cup Parmesan-Reggiano cheese, grated
  • salt and pepper to taste

Instructions

  1. Prep and measure out all of the above ingredients.
  2. Add kale, scapes and green onion to food processor.
  3. Process until a paste starts to form.
  4. Add nuts.
  5. Add olive oil.
  6. Process until smooth and check for desired consistency. Product will thicken a little when the cheese is added. If product is not thin enough, add more oil or some water.
  7. Add cheese.
  8. Process until smooth.
  9. Salt and pepper to taste.

Quick notes

If you are freezing the pesto for later use, wait until you thaw before adding the cheese. Pesto can be made with most greens and nuts. The variations are limitless.  Serve over pasta or as a spread with crackers.

Preparation time: 10 minute(s)


[/print_this]


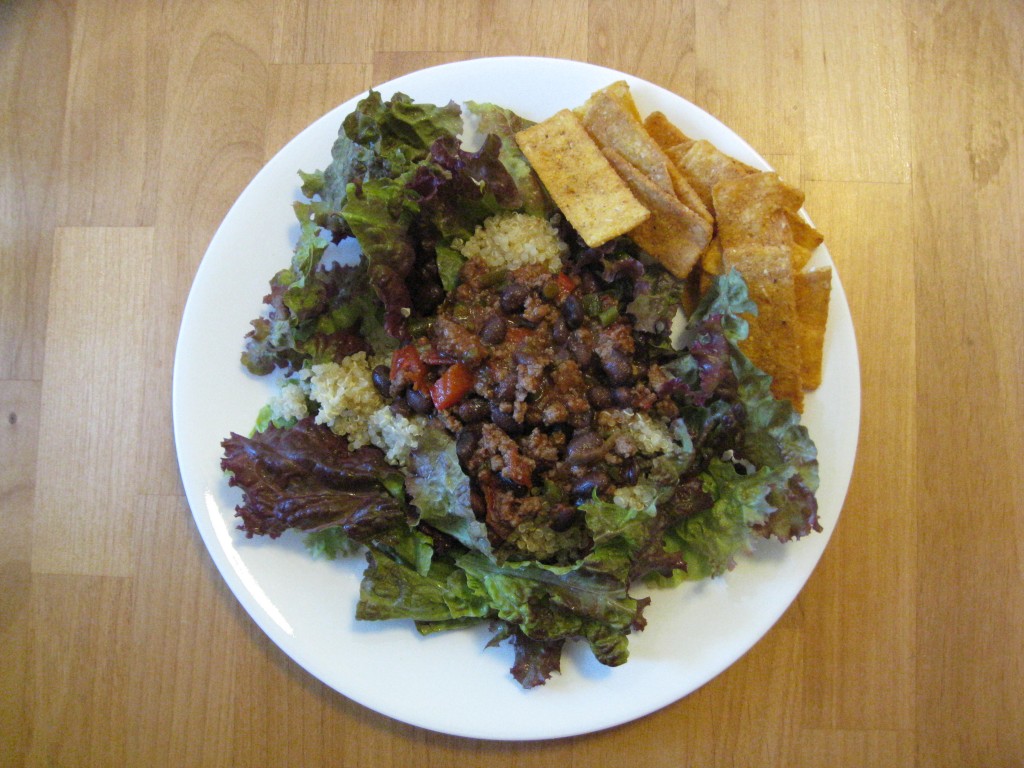
This week in our CSA, we received many items that fit into a Mexican theme.  It seemed appropriate to create a taco salad.

[print_this]

Recipe: Taco Salad

Summary: All ingredients are approximate as I don’t really measure much.

Ingredients

  • 1 T olive oil
  • 3 garlic scapes, chopped
  • 3 green onions, chopped
  • 1 pound local grass fed ground beef
  • 1 cup black beans (already cooked or canned)
  • 2 tomatoes, chopped
  • 1/2 cup water
  • 4 T Penzeys taco seasoning
  • 2 cups quinoa with cilantro, prepared
  • handful of corn chips per person
  • bed of lettuce per person

Instructions

  1. Heat olive oil in skillet.
  2. Add garlic scapes and onion and cook for a couple of minutes.
  3. Add ground beef and cook until beef is almost done.
  4. Drain off grease and return to pan.
  5. Add tomatoes, beans, water and taco seasoning.
  6. Stir to combine. Bring to a boil, simmer until tomatoes are done and sauce is thickened.
  7. Assemble 1/3 cup quinoa and 1/6 of the filling on top of the lettuce.
  8. Add a handful of corn chips to each plate.

Quick notes

To make the quinoa, use a rice cooker. You need 1 part quinoa to 2 parts water. I used previously frozen chopped cilantro that was frozen into ice cubes with water to make up some of the water. Add the cubes to a measuring cup and fill with water to desired level. You can always add fresh cilantro or leave it out.

Preparation time: 10 minute(s)

Cooking time: 20 minute(s)

Number of servings (yield): 6


[/print_this]


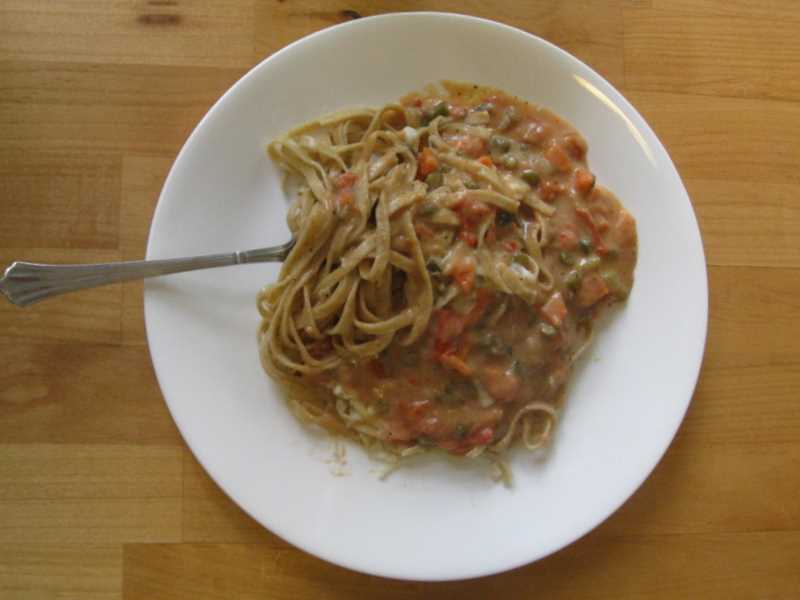
This week in our CSA, we received garlic scapes, tomatoes and Ohio City whole wheat linguini pasta.  This sauce was created to utilize these ingredients as well as some other items on hand.  I needed a sauce with some flavor since I was out of Parmigiano Reggiano cheese which I usually add to my Béchamel sauce.  I served this sauce on top of my linguini with a sprinkle of mozzarella cheese.

[print_this]

Recipe: Chunky Tomato Béchamel Sauce

Summary: All ingredients are approximate as I don’t really measure much.

Ingredients

  • 2 T butter
  • 2 T whole wheat flour
  • 1 cup skim milk
  • 1 t black pepper
  • 1 T olive oil
  • 1 tomato, chopped with seed removed
  • 1 carrot, chopped
  • 2 garlic scapes, chopped
  • 1 T Penzeys pizza seasoning
  • 2 T Penzeys red and green bell pepper flakes
  • 1/4 cup water

Instructions

  1. Melt butter in a non-stick skillet.
  2. Incorporate flour a small amount at a time to make a paste.
  3. Add milk slowly and stir.
  4. Continue to stir frequently until thickened.
  5. Add black pepper.
  6. In another pan, heat olive oil.
  7. Add remaining ingredients.
  8. Continue to cook until it looks like sauce, stirring occasionally.
  9. Once thickened, combine with Béchamel sauce.
  10. Serve over pasta with or without cheese.

Preparation time: 10 minute(s)

Cooking time: 20 minute(s)

Number of servings (yield): 4

[/print_this]


We slept in a bit today.  Sally was up for more than 2 hours last night (second night in a row).  We are hoping that a new tooth or two appears soon.

Shortly after 9am, the kids and I headed to the JCC.  It was PACKED.  Almost all of the cardio equipment was in use.  I was able to snag a treadmill (barely) before everything was full.  Sunday is the busiest day.  Today, it was raining and I think that added to the crowd.

I don’t really care for the treadmill, but I completed 30 minutes.  I also did some plank practice and stretched well.

After lunch, the family made a batch of peanut butter.  We needed some for tonight’s peanut tofu recipe.

IMG_1389

It’s so easy.  I’m not sure that I could go back to the jarred kind.

  1. Get out food processor
  2. Add nuts of your preference (we’ve done peanut, honey peanut and cashew so far)
  3. Process a bit
  4. Add salt, vanilla to taste (about 1/2-1 teaspoon of each)
  5. Process until you reach your desired consistency.
  6. Store in the fridge.

Note: if you want crunchy nut butter, hold some of the nuts out and add them when the butter is closer to the desired consistency.  We use a 16oz bag of nuts and I think our processor is 7 cup so you need to adjust accordingly.  If your nuts are particularly dry and you want more moist butter, you can add a bit of oil.

I love that Nick now says… we need to buy more peanuts because we are out of peanut butter.  I’ve heard you can grown peanut plants locally.  I’d love to try that this year or next.


As far as exercise, today was a planned day off.  I did play at the playground with Nick and Sally and we were busy all day.  Next up: cardio Sat or Sun.

A couple of weeks ago, Giant Eagle had a killer deal on Frosted Mini Wheats (my husband’s cereal of choice) and milk.  I had plenty of Kellogg’s coupons and wanted to make the best out of the deal.  I had just purchased 2 gallons of milk the night before I figured out the deal.  So, with 2 gallons of milk in the fridge, I bought 6 more in 3 days.  I also received coupons for 6 more gallons of milk (but I had a little bit of time to use those).  (I bought 24 boxes of cereal all together.)

We drink a lot of milk at our house.  My husband has a cup a day.  I try to have 2 cups a day.  Nick has a couple of cups a day and Sally drinks about 1/2 gallon a day.  She probably doesn’t quite drink that much, but it’s close, especially after waste.  It ended up being easy to use all of the milk.

  1. I gave 2 gallons away to a friend.
  2. I froze two 1/2 gallon containers of skim milk.
  3. We used 2 cups in pudding.
  4. We used 2 cups in corn muffins.
  5. We used 8 cups in rice pudding.
  6. We drank the rest and already need to buy more today.

I really only froze the milk to see how it worked.  I had read on-line that you could freeze it and that skim milk was the best to freeze.  It tasted ok.  We used it on cereal.  The biggest challenge is getting it to thaw in a timing fashion.  I would freeze milk again, but I would freeze smaller amounts in each container and probably use it for cooking.

I also learned that one of our Giant Eagles locations goes through more milk than the other.  This means fresher milk at one store (better dates).  This tidbit will come in handy for the next sale.

For the first time, I made rice pudding with brown rice.  I read a bunch of recipes for rice pudding on line and then I ended up doing the following:

Brown Rice Pudding

Put the following in a crock pot (mine is a 6 qt).

  • 8c milk (I used skim)
  • 1c brown rice
  • 3/4c sugar
  • 1/4c brown sugar
  • seasoning such as cinnamon/nutmeg to taste.

Cook on high for 4-6 hours until rice is tender (done), stir occasionally.

Add 2 eggs and 1T double strength vanilla.  I tempered the eggs by taking a cup of the mixture out of the crock pot and mixing the eggs with it before adding it back into the crock pot.  It’s supposed to help you not end up with scrambled eggs in the pudding.  It helped, but didn’t totally solve that issue.  Season to your tastes.  I used a bit of nutmeg and tons of cinnamon.

Cook another hour or so until the mixture thickens.  It will thicken more when cooled.

Enjoy!

 Posted by at 8:53 PM